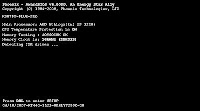
 . Press the "Del" or the "F2" key (Whichever one it says to press) as soon as you see the screen appear. If you missed the chance or didnt see the screen, restart your computer and repeatadly press "Del" and "F2". If you are still having troubles try my How to Access Bios page.
Now that you got into the Bios, there are a few things to note . First make sure that you use the navigation buttons given. They should be somewhere on the screen. Second, note that these settings are very important to your computer and you should never change them without a guide, like this. And last all bios look differently so dont expect yours to look exactly like this.
The boot order options in most BIOS setup utilities will look something like the screenshot .With the boot order shown , BIOS will first try to boot from CD-ROM drive devices., BIOS will next try the hard drive, followed by the , and finally the network.To change which device to boot from first, follow the directions on the BIOS setup utility screen to change the boot order. In this example BIOS, the boot order can be changed using the + and - keys. Remember, your BIOS may have different instructions. Make whatever boot order changes you need and then proceed to the next step to save your settings.To save your changes, follow the instructions given to you in your BIOS utility to navigate to the Exit or Save and Exit menu.Your boot order changes, and any other changes you may have made while in BIOS, are now saved and your computer will restart automatically.
When your computer restarts, BIOS will attempt to boot to the first device in the boot order you specified. If the first device is not bootable, your computer will try to boot from the second device in the boot order, and so on.we set the first boot device to the CD-Rom Drive as an example. As you can see in the screenshot above, the computer is attempting to boot to the CD but is asking for a confirmation first.
Select or create the partition on which you will install Windows XP Professional. Depending upon your existing disk configuration choose one of the following: If the hard disk is unpartitioned, you can create and size the partition on which you will install Windows XP Professional.

Verry helpfull attempt,which is help us....,thanks.
ReplyDelete